Pages

October 31, 2013

Create With Your Soul Canvas - Thursday DT Post for Visible Image Stamps


This week I made a canvas focusing on the Classic Face and Create With Your Soul stamps. I stamped the two stamps onto white cardstock using Archival Ink in Sepia, then sprayed them with Lindy's Stamp Gang mist in Breakfast Club Blue to tone in with the canvas. I misted the canvas with Breakfast Club Blue and Ponderosa Pines Olive, making drips and splats and generally having fun building up the layers. When I was happy with the background I glued the Classic Face and sentiment stamps down and then had fun playing with flowers, metal pieces and wooden cogs, building up around the edges of the canvas.


I learned a lot of this technique from classes taken with Finnabair, but for this one I completely covered all the embellishments (except the fun lightbulb!) in gesso. This gave me the textures of the items and not the colors and I was able to go in with my sprays and use a paintbrush to paint on more color. I really love the texture this brings to the canvas!!  For the background, I used the gorgeous Ripped Fishnet stamp and my all around favorite script stamp Bronte Border to add more depth and detail to the canvas.


I really love how this turned out and I hope you enjoyed looking! If you like any of the stamps, simply click on the link or image to head to the shop. Today is the last day to enjoy FREE worldwide shipping on your order, so hop on over!!


Visible Image also run a challenge each month on their blog. Today is the last day!!!
This month the theme is:
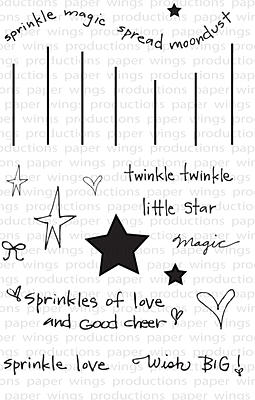
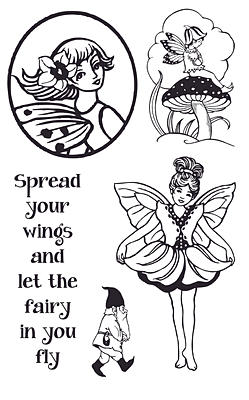
Use a Visible Image Sentiment stamp on a project and link it up, easy peasy,
and you could win £20 of your choice of Visible Image gorgeousness!
Join us over at our fan page on Facebook or join our GROUP!
This month if you load a Visible Image project you've created in the group,
you also have a chance at another £20 prize, you have to be in it to win it though,
so I hope you have a look at the site and get some stamps and join in.


Visible Image will be at the Hobbycraft Show 
at the NEC 7-10 November!
Visit Stand G47 to see their gorgeous stamps in person
and see what great show discounts they have!!!

October 29, 2013

Tag, I'm it!!


Hi, Cathi here again!! Our current challenge at Frosted Designs is to use a tag on your project, so I figured that for my project this week I would join in and make a card with a tag on it, using the gorgeous Fabscraps Shabbylicious papers, and several other items from the store!

I cut a tag out from the gorgeous Shabbylicious paper featuring the bird and flowers, using the pink gingham paper as the base of the card. I added cheesecloth and vintage seam binding from my stash and then used my Heidi Swapp confetti mask to make the masked hearts. I finished my card off with an UmWow flair and chevron confetti.


And because I always try to make extra projects when at all possible, while I had out all by Fabscraps papers I also put together this card with a die cut doily I had nearby and a great sentiment stamp that fit the chairs perfectly (sit - talk - enjoy) I layered the chair images up on the darker background sheet and then added that to the card. A pretty and simple card to send out!

I hope you will join us for our current challenge, enter a card, a layout, any project you can add a tag to!!


October 26, 2013

One Last Very Exciting Announcement!

My plate is now full, and I am so proud to be working with so many amazing companies and challenge blogs!!  My final announcement for a good while now (well maybe a few exciting guest spots to keep secret!) is that I have made the Berry71Bleu Design Team for 2014! I will start my term in January with a group of amazingly talented ladies!!!


and our returning DT members


I have been playing along with the challenges quite often and am looking forward to doing them now as part of the design team!!!

October 24, 2013

Something a Little Different: Thursday DT Post for Visible Image


I wanted to try something a little different and unusual for this week's post! I have made a domino necklace! Yes, flip this over and you will see the domino numbers!


To make this gorgeous type of necklace all you need is a domino, a bail to glue to the back of the domino to lace a chain through, some alcohol inks and some Staz-on Ink. To finish it off you can use a coat of Glossy Accents as a glaze. I used E6000 adhesive to glue the bail onto the domino.


I chose Ranger alcohol inks in Stream and Citrus, used a felt pad and Range applicator and squirted a few drops of each color on different parts of the felt pad. I swirled them around on the domino and kept playing with it until I liked the pattern. It doesn't take long for it to dry.


Next choose some small stamps to use on the domino...I used the gorgeous birds from the Free Your Imagination set as well as the word "free" from that set. The whole stamp says "free your imagination" but I just inked up "free" and stamped it onto the domino. Let dry, and then coat with Glossy Accents.


Add your bail with E6000 adhesive, find a chain and you are done, easy peasy and a different way to use your stamps to make yourself something beautiful!

I hope you like my project, and if the stamps catch your eye, please visit the store by clicking on the link or image! All UK and international shipping is FREE for the entire month of October!


Visible Image also run a challenge each month on their blog.
This month the theme is:
Use a Visible Image stamp on a project and link it up, easy peasy,
and you could win £20 of your choice of Visible Image gorgeousness!
Join us over at our fan page on Facebook or join our GROUP!
This month if you load a Visible Image project you've created in the group,
you also have a chance at another £20 prize, you have to be in it to win it though,
so I hope you have a look at the site and get some stamps and join in.


October 23, 2013

Autumn Beauty with Couture Creations and Core'dinations


It is Autumn here in Ireland, and since we don't have major changes between our seasons (never gets really hot or really cold here) we don't get those amazing trees full of bright colors! I did spot a few colorful leaves (mostly on the ground!) in a local park and brought my oldest daughter Aine along for a little photo shoot! I featured the gorgeous All Occasions Endless Embossing Folder for my layout, absolutely perfect for an Autumn layout!

For my layout I chose several shades of Autumn colors Core'dinations papers and embossed them.


Using my Couture Creations Sanding Block, I sanded the papers revealing the core, and with extra embossed paper, fussy cut some autumn leaves.


Finally, I also used the Sophia Oscar die to cut some flourishes out of cork! I love the earthy look and texture it has!


To put the layout together I first did some "splatting" with Peeled Paint Distress Stain and Walnut Stain Distress Stain. I added some subtle stamping using my Visible Image Bronte Border script stamp. To build up the layout, I layered the three embossed paper, adhering them to the layout with 18mm Double Sided Tape. To give the photo extra dimension I lifted it up with 12mm Foam Mounting Tape.


I added two Core'dinations tags, then started building up an embellishment cluster using my fussy cut leaves, some twine and the gorgeous cork flourishes!


I added some UmWow chevron and heart confetti which I primed with gesso and inked with Prima chalk ink in Rusty Keys. I added brown stitching around the border. The final touch was the title "Autumn Beauty".


I have used this gorgeous sketch from UmWow Chipboard and their gorgeous Chevron and Heart Confetti on my layout. I would love to enter this in their October Challenge!!


I hope you like my Autumn layout this month, and hope to see you sharing your work on the Couture Creations Facebook page!!!

  
Couture Creations products used


Vintage Fairies for Paper Wings Productions

For my What's Up Wednesday post I want to showcase two new stamp sets I have: 


If you know me, you know I love all things vintage, so I had to make some vintage cards. I challenged myself to use things only from my Paper Wings Productions Nesting Components kits as well! Luckily the June Nesting Component Kit came full of gorgeous Pink Paislee Hope Chest goodies, including the 6x6 papers that I used here!


My first card I did uses an image from the Fairies Clear Stamp Set. I stamped it onto the Hope Chest paper and colored it in with Chipped Sapphire and Old Paper Distress Inks. The glittery stars and the sentiment came from the Hanging Stars Clear Stamp Set. I used a gorgeous Prima vine that came from my September Nesting Component Kit. I finished it off with some Martha Stewart small butterfly punches.


I love using vintage images, so I just had to take one from the Winged Things Clip Art Sheet, this little fairy girl is just perfect for the sentiment I took from the Fairies Clear Stamp Set. The velvet ribbon is from the April Nesting Component Kit, which has sold out! I used my sparkly embossing powder to emboss the edges of the vintage image for a great antique touch.

Thanks so much for looking, I hope my cards have inspired you to look into the gorgeous stamp sets, vintage images and mixed media kits Paper Wings Productions stock.

There are a lot of gorgeous Halloween projects being posted on the Paper Wings blog this month, here is a vintage card I made earlier this month with Paper Wings Stamps and images, more details here.


Norma has done a great Halloween Tag and Dias de los Muertos Layout!


Hope you come visit the Paper Wings Productions shop and check out the kits and stamps!!