
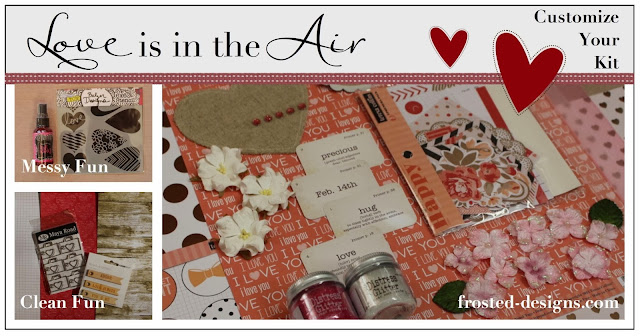
Did you know that long time favorite challenge blog Frosted Designs has not only opened a store in the last few months, but has also started designing some amazing kits!? I am honored to be designing for them for this first term of 2014 and am so excited to show you my first project for the January kit: Love is in the Air!! Isn't this kit amazing? They are customizable kits. I love the way the kit is set up so you can choose a more mixed media addition to your kit with a mist or stencil or a clean option with a few extra papers and embellishments, all fitting within the base price. If you want both there is an option for that too, click on over and find out, and let them know I sent you!

For my layout I have chosen to use both of the options. What can I say, I couldn't choose!! I just love the mists and stencils which I used for my background, and all those yummy embellishments and paper from the clean option too! There are so many great die cuts to layer and add interest to your layout, and I just am in love with the Maya Road Say Cheese Metal Vintage Trinkets! I used molding paste with the stencil as well as splashing Bubble Gum Dylusions spray on the gorgeous Authentique Smitten Foundations paper for a base. I then layered Authentiqe Smitten Written paper and the gorgeous Teresa Collins You Are My Happy Noted paper. There are so many adorable die cuts and stickers in the kit from Teresa Collins as well as the sweet "precious" flashcard from Jillibean Soup! This kit is just full of gorgeousness!!
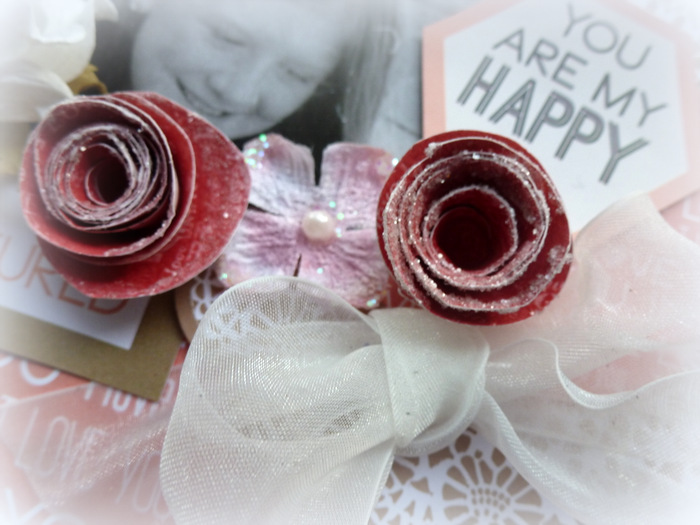
There are some lovely sweet Petaloo flowers in the kit and as I just love flowers, I added my own rolled roses! I will include a tutorial on how to make these frosted rolled roses using free hand cut, die cut or punched circles of paper from the kit and the gorgeous Rock Candy distress glitter!
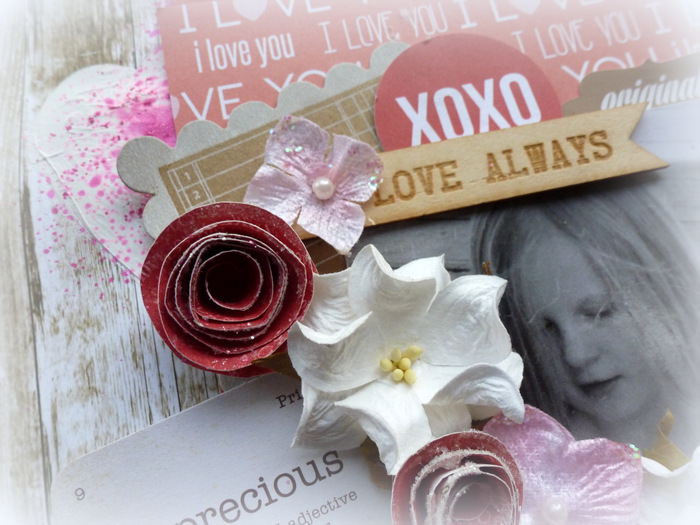
Here you can see the gorgeous Kaisercraft wood banner in the clean kit option, as well as the Maya Road Maya Road White Journal Kraft Tags.
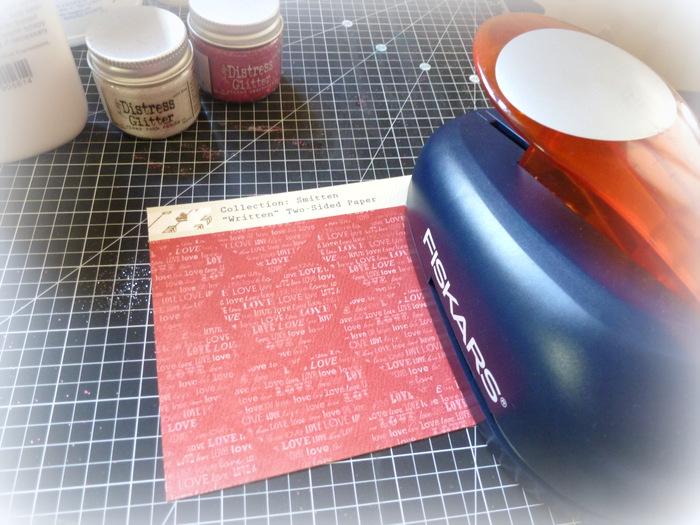
Frosted Rolled Rose Tutorial
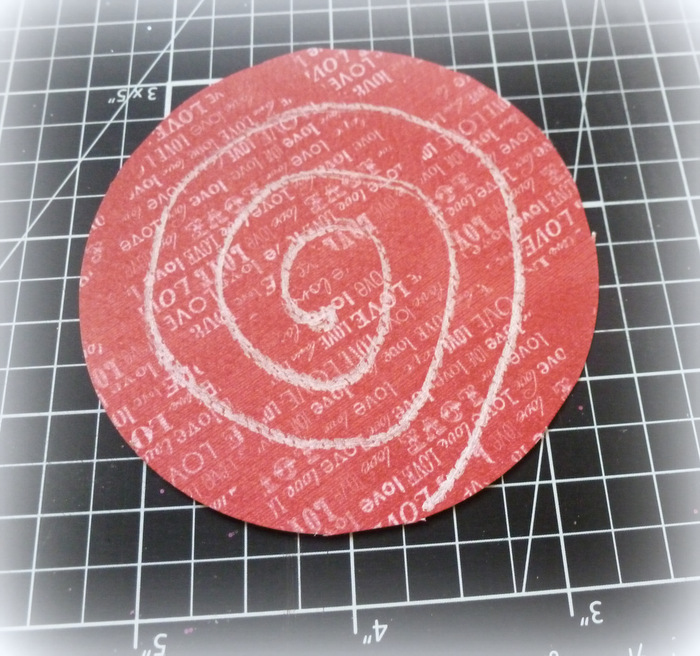
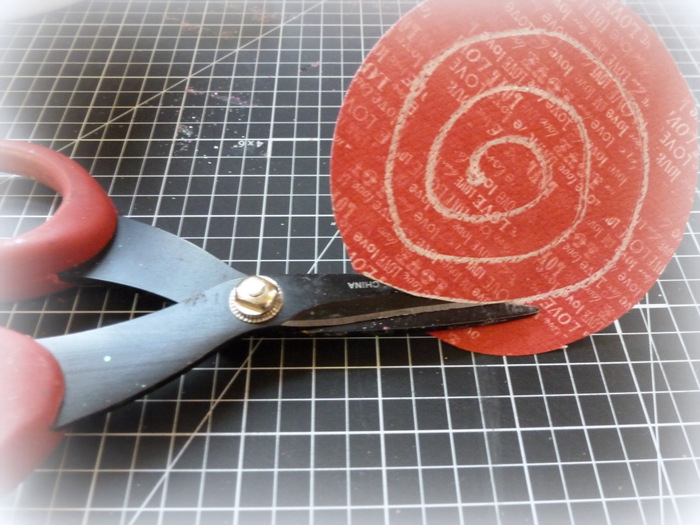
Start your flowers by either cutting out by hand, die cut or punch a three inch circle.
This makes the medium size rose here. I used a 2 1/2 inch circle cut by hand
for my smaller sized rose, as I didn't have a punch in that size.
This makes the medium size rose here. I used a 2 1/2 inch circle cut by hand
for my smaller sized rose, as I didn't have a punch in that size.
I often do my spiral cuts by eye, but I have drawn here with white pencil to show you the
general idea of how to cut out the rolled roses. Just make sure to leave a little circle in the center this will be where you glue down the rolled part of the rose to the base.
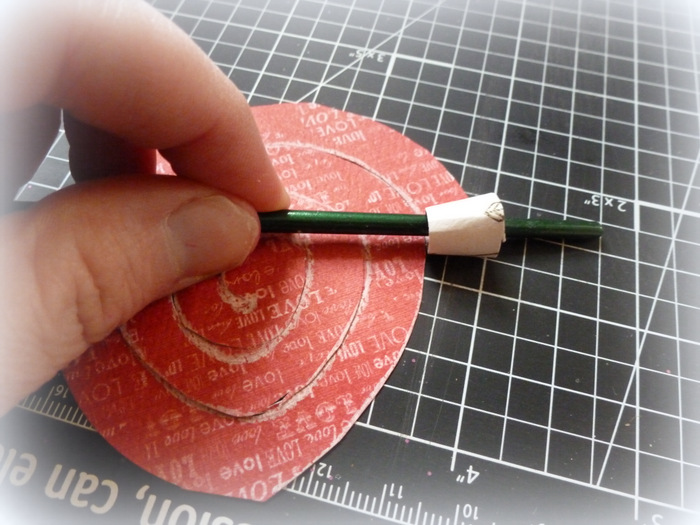
Using a paintbrush you have handy, start rolling the spiral with the paper you want showing
at the end on the inside of the rolled paper. Continue wrapping around the brush til you get to the center of the flower and then glue into place.
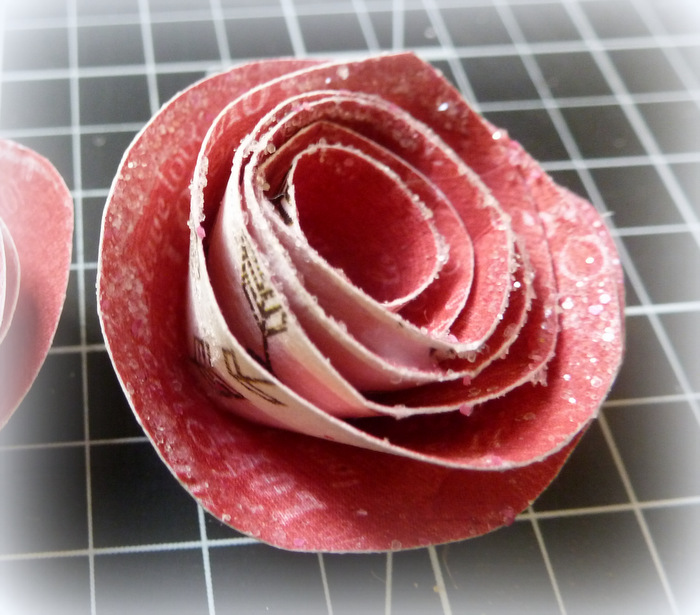
Your rose will look like this when have finished and glued it into place.
This also show a finished frosted rose.
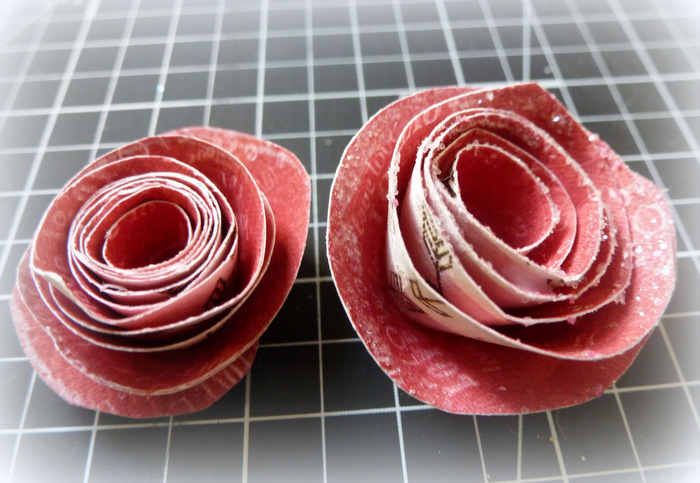
To frost your roses simply add glue in a fine layer around the edges of the flower.

Since the glitter jar is wide mouthed, you can dip these roses right into the jar!
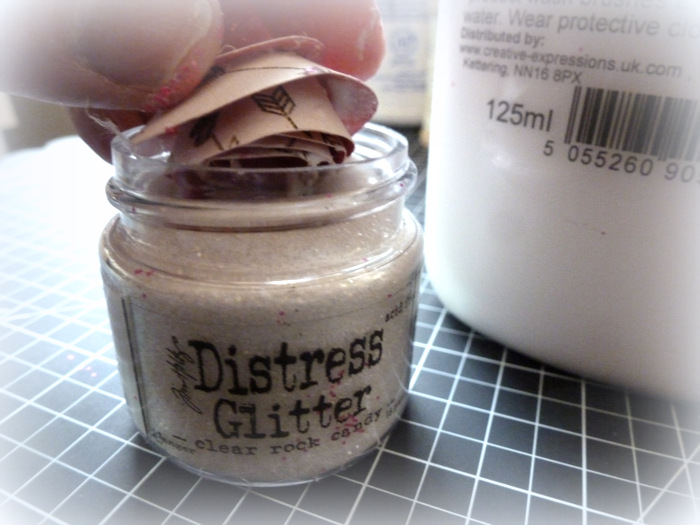
Gorgeous frosted roses to add to your layouts or cards!!
2 comments:
wonderful roses, the layout is also very lovely too
wonderful roses, the layout is also very lovely too
Post a Comment